To fix a peeling heel cover, first assess the damage by inspecting for detachment or cracks. Gather strong adhesive like contact cement and prepare the area by cleaning and sanding. Apply the adhesive in thin layers for bond strength, and use even pressure when reattaching the heel cover. Once set, finish with protective coatings as needed. Follow proper storage and maintenance tips to extend the life of your shoes, and you’ll be ready to tackle more repairs effectively.
Assessing the Damage
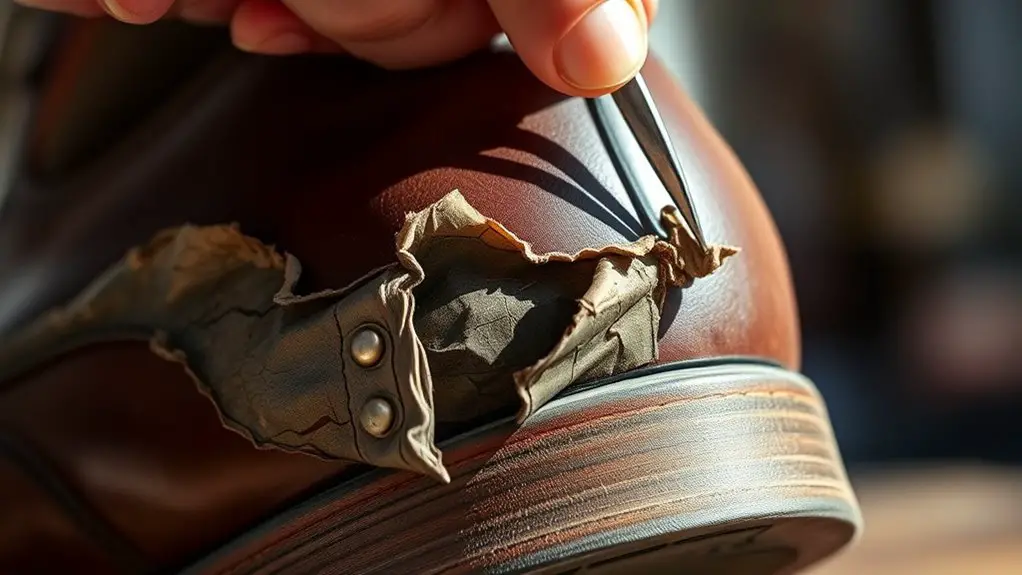
Before you can effectively fix a peeling heel cover, you need to assess the damage to determine the best course of action. Start with a thorough visual inspection of the heel cover. Look for areas where the material is completely detached, partially peeling, or showing signs of wear. Take note of any cracks or tears that might compromise the integrity of the heel cover.
During your damage assessment, evaluate the extent of the peeling. Is it localized to a small area, or is it widespread? Understanding the severity will help you choose the appropriate repair method. Also, consider the material type; some materials may require different adhesives or techniques.
Documenting your findings can be beneficial, especially if you’re unsure about the repair process later. This methodical approach will guarantee you address all issues effectively and prepare for the next steps in repairing your heel cover.
Gathering Your Supplies
Before you start the repair process, it’s vital to gather all necessary supplies. You’ll need essential materials like adhesive, a replacement heel cover, and specific tools to facilitate the fix. Don’t forget to contemplate safety equipment, such as gloves and goggles, to protect yourself during the repair.
Essential Repair Materials
To effectively repair a peeling heel cover, you’ll need a few essential materials that will guarantee a durable fix. First, choose the right adhesive types: a strong contact cement or a flexible shoe glue works best for this kind of repair. These adhesives provide a robust bond, assuring longevity. Next, prepare some fabric patches if the damage is extensive; they can reinforce the heel cover and enhance durability. Additionally, have a clean cloth handy to wipe away excess adhesive and guarantee a neat application. Finally, consider using a small brush for precise adhesive application, which can help in reaching tight areas. Gathering these materials will set you up for successful repair techniques, allowing you to restore your heel cover effectively.
Tools Needed for Fixing
Gathering the right tools is essential for effectively fixing a peeling heel cover. You’ll need a few specific repair tools and adhesive types to guarantee a successful restoration. Below is a table to help you identify what you’ll require:
| Tool/Material | Purpose | Recommended Adhesive Types |
|---|---|---|
| Scissors | Trim peeling edges | Contact cement |
| Sandpaper | Smooth rough surfaces | Super glue |
| Brush or Applicator | Apply adhesive | Rubber adhesive |
| Cloth | Clean surfaces before applying | Fabric glue |
Having these tools on hand will streamline your repair process and enhance the durability of your heel cover fix. Make sure to choose the right adhesive types for the best results.
Safety Equipment Considerations
When fixing a peeling heel cover, guaranteeing your safety during the repair process is essential. Adhering to safety standards not only protects you but also enhances equipment durability. Before you start, gather the following safety equipment:
- Safety goggles: Protect your eyes from adhesive fumes and debris.
- Gloves: Prevent skin contact with harmful chemicals and sharp tools.
- Dust mask: Guard against inhaling any dust or particulates during sanding.
Using appropriate safety gear minimizes risks and guarantees a smoother repair process. Remember, taking precautionary measures not only contributes to your safety but also improves the longevity of your tools and materials. Being prepared helps you focus on the task at hand without unnecessary distractions.
Preparing the Area
Before you start fixing the peeling heel cover, confirm the area is clean and well-prepared to achieve the best results. Effective surface preparation is essential for a successful repair. Begin by gathering necessary cleaning supplies and tools.
| Cleaning Technique | Purpose | Recommended Tools |
|---|---|---|
| Dry Dusting | Remove loose debris | Soft cloth or brush |
| Wet Wiping | Eliminate grime and oils | Damp cloth |
| Solvent Cleaning | Dissolve old adhesive residues | Acetone or isopropyl alcohol |
| Sanding | Smooth the surface for adhesion | Fine-grit sandpaper |
| Final Inspection | Confirm cleanliness | Visual check |
Use these cleaning techniques to prepare the heel cover’s surface adequately. Proper preparation enhances adhesive bonding, guaranteeing longevity in the repair.
Applying Adhesive
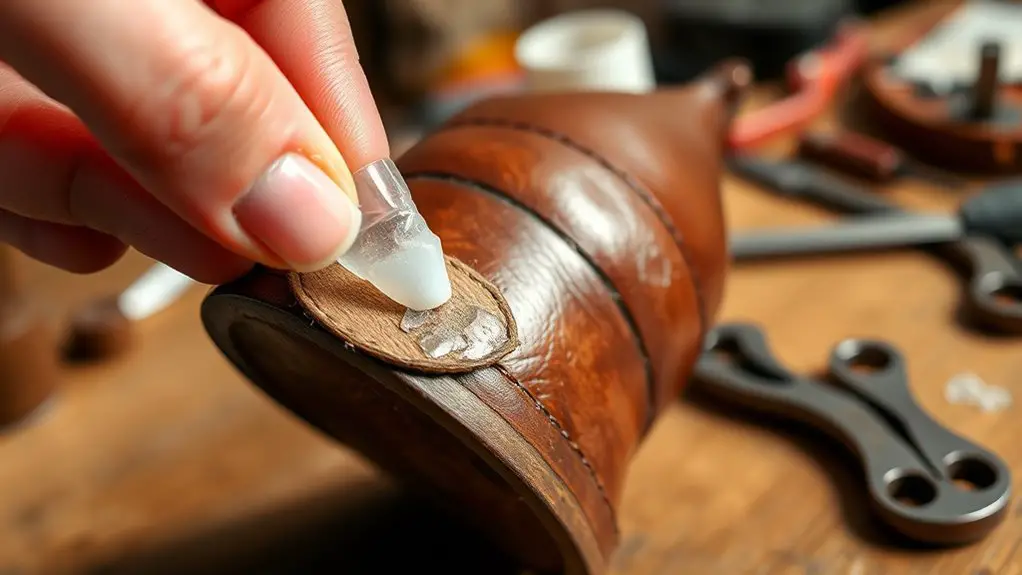
After guaranteeing the surface is clean and smooth, it’s time to apply the adhesive. Selecting the right adhesive types is vital for a successful repair. Common options include cyanoacrylate, polyurethane, and rubber cement, each offering different bonding strengths and drying times.
Selecting the right adhesive is crucial for a successful repair, with options like cyanoacrylate, polyurethane, and rubber cement each offering unique benefits.
When applying the adhesive, consider these application techniques:
- Precision: Use a small applicator or brush to target the area without excess overflow.
- Layering: If using thicker adhesives, apply in thin layers to enhance bonding and reduce drying time.
- Pressure: After application, apply even pressure for several minutes to guarantee a strong bond.
Make sure to follow the manufacturer’s instructions for best results. Properly applied adhesive will greatly improve the durability of your heel cover and prevent future peeling.
Reattaching the Heel Cover
Reattaching the heel cover requires careful alignment and proper technique to guarantee a lasting repair. Begin by confirming the surfaces of both the heel and the cover are clean and free of old adhesive. Choose an appropriate adhesive type; for rubber or synthetic materials, a strong contact adhesive works well, while for fabric, a fabric glue might be more suitable. Apply a thin layer of the adhesive evenly on both surfaces, following the manufacturer’s instructions for drying time. Carefully align the heel cover with the heel, making sure it fits snugly. Press firmly for several seconds to secure the bond. If using a contact adhesive, allow the adhesive to set according to the instructions before moving on. Check for any gaps or misalignment and make necessary adjustments. A precise reattachment is essential for durability and performance, so take your time to confirm a proper fit.
Finishing Touches and Maintenance
Once you’ve reattached the heel cover, it’s essential to maintain its integrity. Regular cleaning techniques will help preserve the material, while applying a protective coating can enhance durability. Additionally, proper storage practices will prevent further damage and extend the life of your heel cover.
Regular Cleaning Techniques
To maintain the integrity of your heel cover, regular cleaning is essential. Implementing effective cleaning techniques can greatly extend its lifespan and appearance. Here are some recommended practices for regular maintenance:
- Use a Soft Brush: Gently remove dirt and debris without scratching the surface.
- Mild Soap Solution: Clean with a mixture of warm water and mild soap to avoid damaging materials.
- Dry Thoroughly: Confirm the heel cover is completely dry before storage to prevent moisture-related issues.
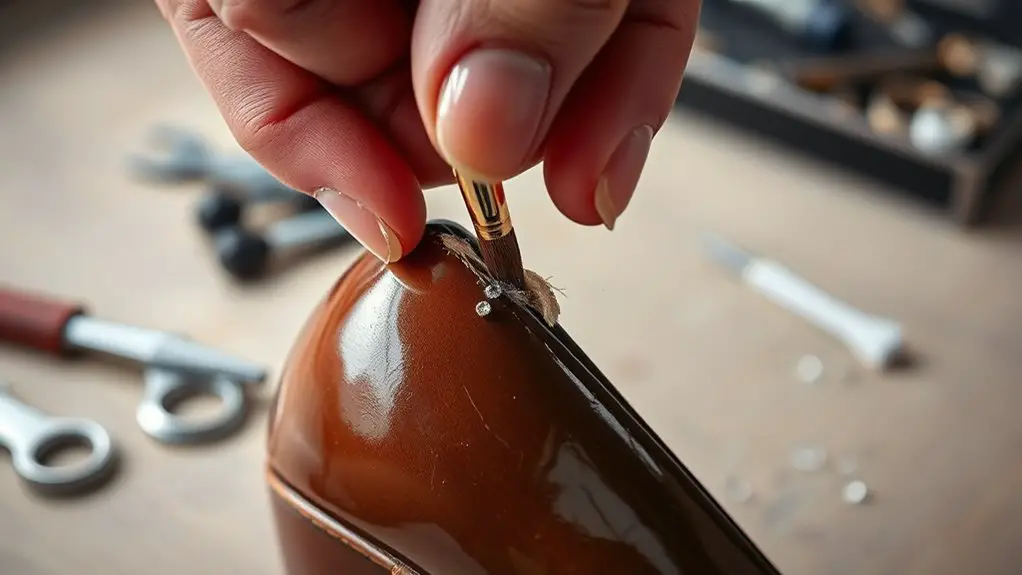
Protective Coating Options
Applying a protective coating can greatly enhance the durability and appearance of your heel cover. Various coating types, like polyurethane and acrylic, provide different levels of protection. It is crucial to choose the right application methods, whether spray, brush, or dip, depending on your comfort level and the specific coating.
| Coating Type | Application Method |
|---|---|
| Polyurethane | Spray, Brush |
| Acrylic | Brush, Dip |
| Epoxy | Brush, Roll |
| Silicone | Spray, Brush |
| Varnish | Brush, Dip |
Before applying any coating, make sure the surface is clean and dry. Following these guidelines not only prolongs the life of your heel cover but keeps it looking fresh and new.
Storage Best Practices
While proper application of protective coatings is essential, how you store your heel covers can greatly impact their longevity and performance. Effective shoe storage and humidity control are key factors to take into account. Here are some best practices for storing your heel covers:
- Keep in a cool, dry place: Avoid areas with extreme temperatures or high humidity to prevent deterioration.
- Use breathable shoe bags: Opt for fabric bags that allow air circulation, reducing moisture buildup.
- Avoid overcrowding: Make sure there’s enough space between shoes to prevent unnecessary friction and pressure on the heel covers.
Frequently Asked Questions
Can I Use Super Glue for Reattaching Heel Covers?
You can use super glue for reattaching heel covers, but consider super glue alternatives like contact cement or shoe adhesive for better flexibility. Always follow shoe repair tips for ideal results and longevity of your repair.
How Long Should I Wait Before Using the Shoe Again?
You should wait at least 24 hours for proper adhesion before using your shoe again. This waiting period guarantees ideal shoe comfort, allowing the adhesive to cure fully and preventing any further damage to the heel cover.
What Should I Do if the Cover Is Completely Torn?
If your cover’s completely torn, consider replacement options like fabric or rubber. Match the shoe materials for durability. Carefully assess the damage, then choose a solution that restores your footwear’s function and flair effectively.
Is It Possible to Prevent Heel Cover Peeling in the Future?
To prevent heel cover peeling, focus on preventive maintenance and proper material selection. Regularly inspect the covers for wear and choose durable materials to enhance longevity, ensuring they withstand daily use and environmental factors effectively.
Can I Use Fabric Instead of Adhesive for Repairs?
Yes, you can use certain fabric types as adhesive alternatives for repairs. Choose durable, strong fabrics like canvas or denim, ensuring they adhere well. Proper preparation and techniques are essential for effective repair and longevity.