To repair a broken high heel at home, first assess the damage by examining the heel type and any visible cracks. Gather necessary tools, including strong adhesives suited for your heel’s material. For breaks, apply the adhesive carefully, ensuring a secure bond, and use clamps to hold it in place while it cures. If straps are detached, clean the surfaces, apply adhesive evenly, and secure. For scuffs, touch-up paint can restore appearance. Discover more effective techniques for lasting repairs.
Assessing the Damage
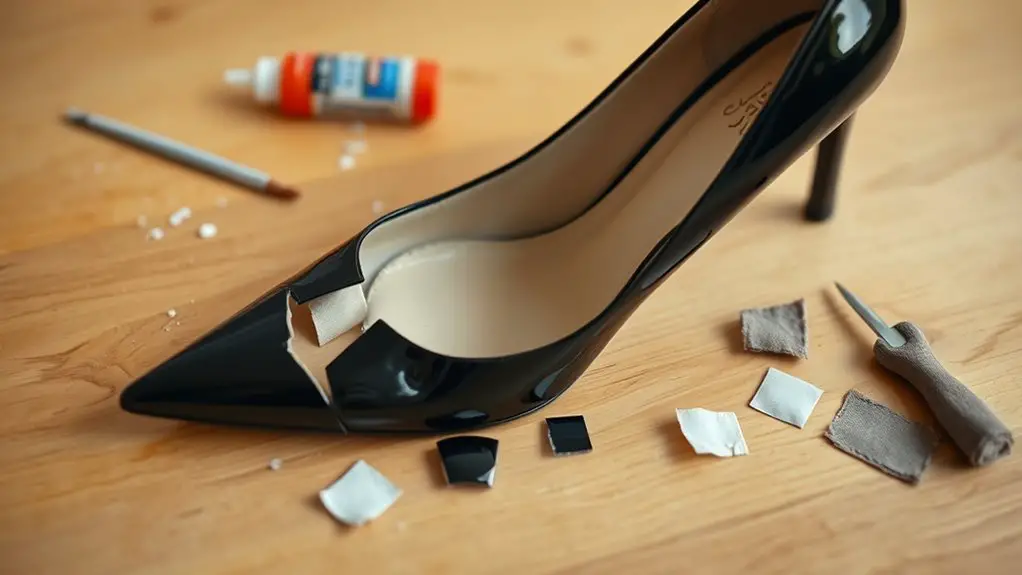
Before you can begin repairs on your broken high heel, it’s essential to evaluate the damage carefully. Start by examining the heel type—whether it’s a stiletto, block, or wedge—as each requires different repair techniques. Look for cracks, breaks, or separation between the heel and the shoe body. Damage identification is critical; use your fingers to feel for any irregularities or loose components that might not be visible.
Check the heel base for wear, as this may impact stability and comfort even if the heel isn’t visibly broken. If you notice any missing pieces, take note of them, as replacements might be necessary. Finally, assess the material of your heel—leather, plastic, or wood—as this will dictate the appropriate repair method. By thoroughly evaluating the damage, you’ll guarantee a more effective and lasting repair process.
Tools and Materials Needed
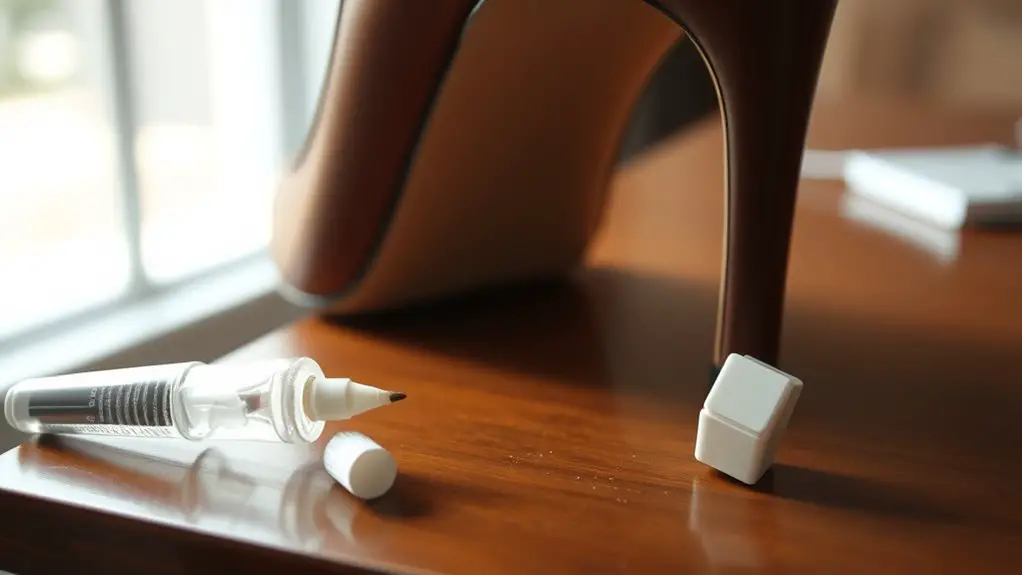
To successfully repair your broken high heel, you’ll need a specific set of tools and materials that cater to the type of damage you’ve identified. First, gather various glue types suitable for shoe repair, such as cyanoacrylate or polyurethane adhesive, which offer strong bonds. You’ll also want to have a repair kit, which usually includes a variety of adhesives, patches, and tools like a small brush for applying glue precisely.
Additionally, keep on hand a pair of scissors for trimming, a craft knife for detailed work, and clamps or rubber bands to hold parts together while the adhesive cures. A clean cloth is essential for removing excess glue and ensuring surfaces are debris-free. Finally, a file can help smooth rough edges, ensuring a seamless finish. With these tools and materials ready, you’ll be well-equipped to tackle the repair process effectively.
Fixing a Broken Heel
When your high heel breaks, it’s crucial to assess the damage before diving into repairs, as different issues require specific approaches. If you’re dealing with a broken heel, identifying your heel type—whether it’s a stiletto, block, or kitten heel—will guide your repair techniques. For a stiletto heel, you can often use strong adhesive to bond the broken pieces together. Make certain to clean the surfaces first for better adhesion.
For block heels, check for cracks; if present, use a two-part epoxy to fill any gaps and reinforce the structure. Clamp the heel securely while the adhesive cures. In cases where the heel has completely snapped off, consider replacing it with a new heel of the same type. This may require precise measurements and some woodworking skills for a seamless fit. Always allow sufficient drying time before wearing your heels again to guarantee the repairs hold.
Reattaching a Detached Strap
To reattach a detached strap, you’ll first need to gather the necessary materials, such as strong adhesive and a cleaning cloth. Next, prepare the surface by ensuring it’s free of dust and residue for best adhesion. Finally, secure the strap in place, applying even pressure to guarantee a solid bond.
Gather Necessary Materials
Before you start reattaching a detached strap on your high heel, it’s essential to gather the right materials to guarantee a secure and lasting repair. Proper preparation is key in shoe repair, especially when using DIY techniques. Here’s what you’ll need:
- Strong adhesive: Look for a fabric or leather adhesive designed for shoe repairs.
- Clamps or clips: These will help hold the strap in place while the adhesive sets.
- Clean cloth: Use this to wipe down surfaces, ensuring a clean bond.
With these materials at hand, you’ll be well-equipped to perform the repair effectively. Remember, a well-prepared workspace can make all the difference in achieving a professional-looking result.
Prepare the Surface
Making sure that the surfaces you’ll be bonding are clean and free of debris is crucial for a successful repair. Start by using a soft cloth to wipe down both the strap and the shoe’s attachment point. This surface preparation step removes dirt, oils, and any old adhesive residue. For tougher grime, consider employing cleaning techniques such as rubbing alcohol or a gentle soap solution. Apply the cleaner to your cloth, not directly to the shoe, to prevent moisture damage. After cleaning, allow the surfaces to dry completely to guarantee peak adhesion. This meticulous attention to detail in surface preparation will greatly enhance the effectiveness of the adhesive you’ll be using, providing a sturdy bond for your high heel’s strap.
Secure the Strap
With the surfaces now prepared, you’re ready to secure the strap back to the shoe. Start by determining the strap type and material to guarantee a proper bond. Use a strong adhesive suitable for the materials involved, such as leather or synthetic fabrics.
Here’s what to take into account during reattachment:
- Clean the surfaces: Confirm both the strap and shoe are free from dust and oils.
- Apply adhesive evenly: Use a small amount to avoid excess that could ooze out.
- Press firmly and let cure: Hold the strap in place for the recommended cure time for maximum strength.
Repairing Scuffed Surfaces
When you notice scuffs on your high heels, the first step is to accurately assess the extent of the damage. Next, clean the surface thoroughly to remove any dirt or debris that could interfere with the repair process. Finally, you’ll apply touch-up paint that matches the shoe’s color to restore its appearance and protect the material.
Assessing the Damage
Although scuffed surfaces might seem like a minor issue, they can greatly impact the overall appearance of your high heels. To effectively assess the damage, perform a thorough visual inspection. Look for:
- Depth of the scuff: Is it merely superficial, or does it penetrate deeper into the material?
- Location of the damage: Is the scuff on a visible area, like the toe or heel, or is it more discreet?
- Material type: Different materials react differently; leather may require distinct care compared to synthetic materials.
A careful damage assessment will help you determine the best course of action for repairs, ensuring your high heels regain their elegance and shine without compromising their integrity.
Cleaning the Surface
Cleaning the surface of your high heels is vital for restoring their original luster and minimizing the appearance of scuffs. Begin with proper surface preparation by removing any dirt or debris with a soft, dry cloth. Choose suitable cleaning products that match your shoe material—leather, suede, or synthetic. For leather, a gentle leather cleaner is ideal, while a suede brush can effectively address scuffs on suede surfaces. Apply the cleaning product sparingly, following the manufacturer’s instructions, and use a microfiber cloth to gently buff the area. Always test a small, inconspicuous area first to verify compatibility. Once cleaned, let the heels dry completely before proceeding with any further repairs. This step is essential to achieve a flawless finish.
Applying Touch-Up Paint
Applying touch-up paint is an essential step in repairing scuffed surfaces on your high heels, as it helps restore their appearance and prolongs their lifespan. To achieve a seamless finish, focus on color matching before you start the paint application.
Here are some tips to guarantee a successful touch-up:
- Choose the right paint: Use a paint specifically formulated for shoes, ensuring it adheres well to the material.
- Test the color: Apply a small amount on an inconspicuous area to confirm it matches your heels.
- Apply thin layers: Use a fine brush for precision, applying multiple thin layers rather than one thick coat to avoid drips.
Restoring Worn Out Soles
When it comes to restoring worn-out soles, understanding the materials and techniques involved can significantly extend the life of your favorite high heels. You’ll encounter various sole materials like rubber, leather, and synthetic options, each requiring specific care.
To effectively reattach or replace worn soles, you’ll need to choose the right adhesive types, such as contact cement for rubber soles or leather glue for leather. Here’s a simple guide:
| Sole Material | Recommended Adhesive | Application Tips |
|---|---|---|
| Rubber | Contact Cement | Confirm surfaces are clean. |
| Leather | Leather Glue | Apply evenly for a strong bond. |
| Synthetic | Super Glue | Use sparingly to avoid overflow. |
Preventative Measures for Longevity

After addressing worn-out soles, it’s important to contemplate preventative measures that can help maintain the integrity of your high heels over time. Engaging in regular high heel maintenance is essential for longevity. Here are some effective strategies:
- Use heel caps: These protective accessories can prevent damage to the heel tips and minimize wear.
- Store properly: Keep your heels in a cool, dry place, ideally in their original boxes or dust bags, to shield them from environmental factors.
- Rotate your shoes: Avoid wearing the same pair daily; rotating your footwear can reduce stress on individual pairs.
Implementing these practices not only prolongs the life of your high heels but also guarantees they remain in peak condition. Paying attention to shoe storage and maintenance habits will ultimately save you time and money in repairs, allowing you to enjoy your favorite heels for years to come.
When to Seek Professional Help
While regular maintenance can extend the life of your high heels, there are times when the damage may exceed what you can handle on your own. Knowing when to seek assistance is essential to avoid further complications.
| Damage Type | Signs You Should Seek Help | Recommended Action |
|---|---|---|
| Broken Heel | Heel detachment or fractures | Consult a professional cobbler |
| Worn Out Soles | Significant wear or peeling | Replace soles at a shoe repair shop |
| Damaged Upper | Rips, tears, or significant stains | Professional cleaning or repair |
| Misaligned Structure | Unstable heel or shoe shape | Visit a specialist for structural repair |
If you notice any of these issues, don’t hesitate to seek assistance. Addressing problems early can preserve the integrity of your high heels and guarantee they remain wearable for years to come.
Tips for Future Care of High Heels
Taking proactive steps in caring for your high heels can markedly reduce the likelihood of encountering serious damage. To guarantee effective high heel maintenance, consider the following tips for protecting heels:
- Rotate your shoes: Avoid wearing the same pair daily; give them time to rest and regain their shape.
- Store properly: Keep your high heels in a dust bag or box, and use shoe trees to maintain their structure.
- Use heel protectors: Invest in heel caps or gel pads to prevent wear and tear on the heel tips.
Regularly inspect your heels for signs of wear, and clean them gently after each use. This not only maintains their appearance but also extends their lifespan. Embracing these practices will not only enhance your wearing experience but also safeguard your investment in high-quality footwear. Remember, consistent care goes a long way in preserving your stylish high heels.
Frequently Asked Questions
Can I Use Super Glue for All Types of Heel Repairs?
You can use super glue for many heel repairs, but it’s not ideal for all materials. Consider super glue alternatives like epoxy or shoe adhesive for more durable results. Explore various heel repair techniques for best outcomes.
How Long Does a High Heel Repair Usually Last?
The repair longevity of a high heel largely depends on the materials used and the quality of the repair. If done properly, you can expect reasonable heel durability, lasting several weeks to months under regular use.
Are There Specific Brands of Glue Recommended for High Heels?
When your heels shatter like glass, you’ll want a reliable adhesive. Brands like Shoe Goo or E6000 excel in shoe repair. Both offer strong bonds, ensuring your favorite pairs stand tall and proud once more.
Can I Repair My Heels Without Any Special Tools?
Yes, you can repair your heels without special tools. Basic shoe maintenance techniques, like using strong adhesive or tape, can effectively fix minor issues. Just guarantee the surfaces are clean for a lasting repair.
What Is the Best Way to Store High Heels After Repair?
After repair, it’s essential you consider effective storage methods. You’ll want protective cases that cushion your heels, preventing damage. Remember, proper storage not only preserves their beauty but also extends their lifespan, ensuring you enjoy them longer.