To paint your old heels and give them a fresh style, start by gathering supplies like painter’s tape, high-quality acrylic paint, and a sealant. Clean your heels thoroughly and remove any existing finish. Pick a trendy color that complements your wardrobe, then apply the paint in thin layers. Add fun embellishments or stencils for a unique touch. Finally, don’t forget to maintain your newly styled heels for long-lasting flair. Want to discover more tips?
Gather Your Supplies
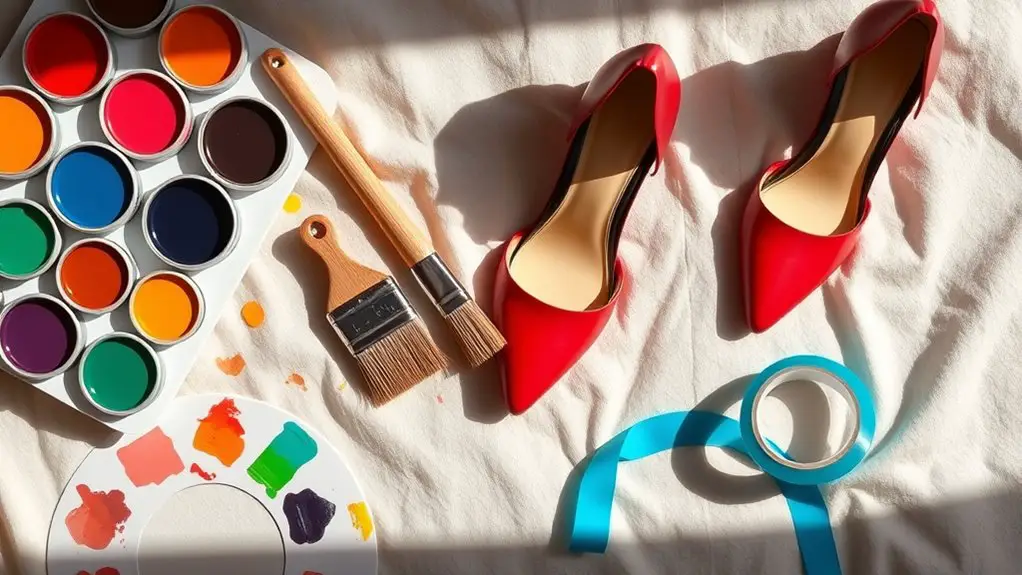
Before you plunge into giving your old heels a fresh new look, let’s talk supplies. You’ll want to make sure you’ve got everything on hand for a smooth transformation. Start by gathering supplies like painter’s tape, which will help you create clean lines, and a soft cloth for any pre-paint prep. Don’t forget your essential tools—a high-quality acrylic paint in your favorite shade, a small paintbrush for detailed work, and a foam brush for larger areas.
You might also need a sealant to protect your masterpiece once it’s dry. If you’re feeling extra creative, some glitter or decals can add that wow factor. Having all your supplies ready will keep you organized and make the whole process feel effortless. So, grab your toolkit and get ready to turn those old heels into a stunning statement piece that’ll have everyone asking where you got them!
Prepare Your Heels
Before you release your creativity on those old heels, you’ve gotta get them ready for their makeover. Start by cleaning the surface to remove any dirt and grime, then strip away that old finish so your new paint sticks like a pro. Don’t forget to choose the right materials that’ll make your heels shine and last!
Clean the Surface
To kick off your heel transformation, you’ll want to make sure those shoes are squeaky clean. Grab your cleaning supplies and get ready to give your heels the TLC they need for surface preparation. You’ll be amazed at how fresh they’ll look!
| Step | Supplies Needed | Cleaning Tips |
|---|---|---|
| Dusting | Soft brush | Remove loose dirt |
| Wiping | Mild soap & water | Use a damp cloth |
| Drying | Microfiber cloth | Pat dry, avoid soaking |
| Inspecting | Good lighting | Check for scuffs |
Once they’re spotless, you’ll set the perfect canvas for that fabulous new color. Happy cleaning!
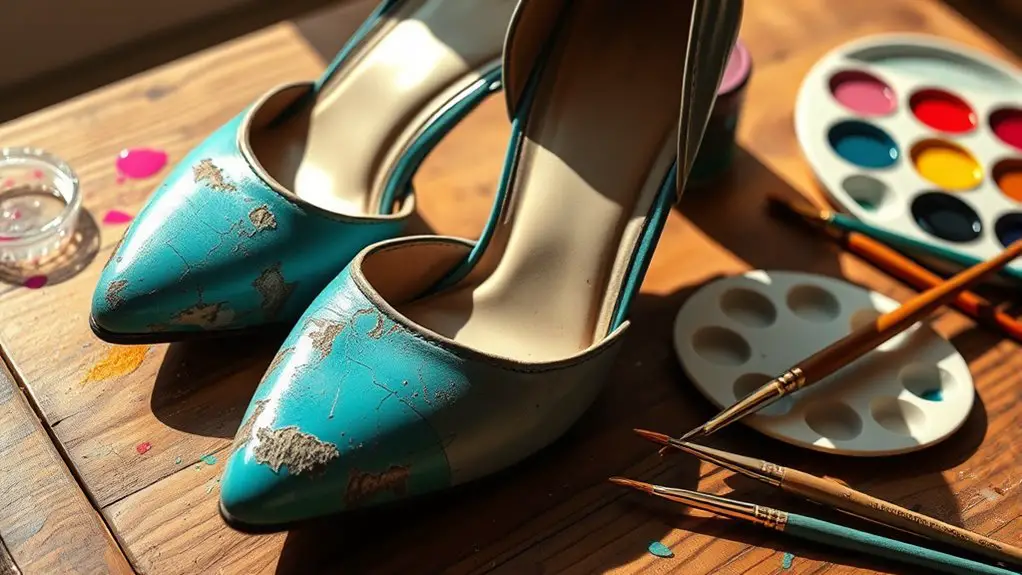
Remove Existing Finish
With your heels now sparkling clean, it’s time to tackle the existing finish. You want those bad boys ready for a fresh coat of paint! Here’s how to remove that old finish using effective stripping methods:
- Choose a stripper: Look for a gentle chemical or a DIY solution to avoid damaging the material.
- Apply it: Use a brush or cloth to spread the stripper evenly over the surface.
- Let it sit: Give it a few minutes to work its magic.
- Scrape it off: Carefully remove the softened finish with a plastic scraper, ensuring you don’t scratch the leather.
Once you’ve stripped away that old paint, you’re all set to explore stunning paint types for your revamped heels!
Choose Appropriate Materials
Choosing the right materials can make all the difference in your heel makeover. Start with selecting the right paint types; you’ll want to go for acrylic or leather paint, depending on your heel’s material. If they’re leather, make sure you grab some paint that’s specifically formulated for leather surfaces. For synthetic materials, look for flexible paint that won’t crack after wear.
Next, consider material compatibility—your paint should adhere well to the surface. Don’t forget to grab a good primer for an even finish and longevity. A sealant can also help protect your newly painted heels from scuffs and scratches. With the right materials in hand, you’re all set to transform those old heels into stylish showstoppers!
Choose Your Color
Now that your heels are prepped and ready, it’s time to choose a color that speaks to your style! Think about trending palettes, what’s hanging in your wardrobe, and the vibe of the season ahead. This is your chance to get creative and make those old heels pop!
Trending Color Palettes
When it comes to revamping your old heels, picking the right color can make all the difference. This season, embrace trending color combinations that breathe new life into popular shoe styles. Here are four palettes to contemplate:
- Pastel Dream: Soft pinks and baby blues for a fresh, feminine touch.
- Bold Neons: Bright yellows and electric greens to make a statement.
- Earthy Tones: Rich browns and deep greens for a natural vibe.
- Classic Monochrome: Timeless black and white for an elegant, chic look.
Mix and match these colors or go for a sleek ombre effect. Your heels deserve a makeover that showcases your personality and keeps you on-trend!
Consider Your Wardrobe
How can you guarantee your newly painted heels will seamlessly fit into your wardrobe? Start by considering your wardrobe staples. Think about the colors you wear most often—those go-to pieces that make getting dressed a breeze. If you’ve got a lot of neutral tones, a bold pop of color on your heels can elevate your outfits. Alternatively, if your wardrobe leans towards vibrant hues, painting your heels in a complementary shade guarantees perfect color coordination. Don’t forget to factor in your personal style; whether you’re classic, bohemian, or edgy, your heels should reflect that vibe. By aligning your new heel color with your existing pieces, you’ll create a cohesive and stylish look that’s totally you!
Seasonal Color Choices
As the seasons change, so should your heel colors, creating an exciting opportunity to express your style. Embrace the fresh vibes of each season by choosing the perfect hues for your painted heels. Here’s a quick guide to keep your footwear on-trend:
- Spring Pastels: Think soft pinks, mint greens, and baby blues to reflect blooming flowers.
- Summer Brights: Go bold with vibrant yellows, electric blues, and fiery reds that scream fun.
- Autumn Earthtones: Rich browns, burnt oranges, and deep greens will ground your look in cozy vibes.
- Winter Neutrals: Classic blacks, whites, and grays will keep your style sleek and sophisticated.
Apply the Paint
Grab your paintbrush and let’s plunge into the exciting part—applying the paint! First, decide on your paint techniques. A sponge brush gives a soft finish, while a fine-tip brush allows for detailed designs. If you’re feeling adventurous, try layering different colors for a unique effect!
Start with a thin coat to avoid drips, and don’t forget to let each layer dry properly. Keeping an eye on the drying time is essential—about 30 minutes should do the trick before adding another coat. If you want a bolder look, don’t hesitate to go for a third layer, but remember: patience is key!
As you paint, channel your inner artist. Feel free to add patterns or splatters for some flair. Just make sure you’re working in a well-ventilated area and wearing your apron, because things might get a little messy! Now, get creative and watch those old heels transform!
Add Finishing Touches
Now that your heels are looking fabulous, it’s time to add those finishing touches that’ll truly make them shine. These details will elevate your look and show off your personality. Here’s how to amp them up:
Elevate your fabulous heels with stunning details that reflect your personality and creativity!
- Add Embellishments: Think rhinestones, studs, or beads. These sparkling accents can transform your heels from basic to stunning.
- Use Stencils: Get creative with patterns! Stencils allow you to paint unique designs that express your style.
- Add a Glossy Topcoat: A clear, glossy finish not only protects your paint but also gives your heels a chic shine.
- Personalize with Color: Consider painting the soles or adding a fun color block for a trendy twist.
With these finishing touches, your heels will be uniquely yours and ready to strut your stuff! So go ahead, get creative, and enjoy your refreshed footwear!
Care for Your Newly Painted Heels
Once you’ve added those fabulous finishing touches to your heels, it’s time to think about keeping them looking pristine. Establishing a solid maintenance routine will guarantee your newly painted heels shine for seasons to come. Here are some care tips to help you out:
| Care Tips | Frequency | Notes |
|---|---|---|
| Light Cleaning | After each wear | Use a soft cloth |
| Protective Spray | Monthly | Apply to prevent scuffs |
| Store in Dust Bags | Every time | Keeps dust away |
| Touch Up Paint | As needed | Fix small scratches |
Frequently Asked Questions
Can I Use Acrylic Paint on Leather Heels?
You can use acrylic paint on leather heels, but don’t forget leather preparation! Clean ’em well and apply a primer for better adhesion. It’ll give your shoes that trendy vibe while ensuring they last longer.
How Long Will the Paint Last on My Heels?
The paint durability on your heels depends on the materials. If you’re using leather, it might last longer than fabric. Just remember, proper prep and sealing can really amp up the longevity of your stylish transformation!
Is It Safe to Paint Heels That Are Patent Leather?
You might think patent leather’s glossy finish makes it risky to paint, but with the right paint adhesion techniques, you can totally transform those shoes. Just remember to prep properly for the best results and durability!
Can I Use Spray Paint Instead of Brush-On Paint?
You can definitely use spray paint! It offers quick coverage and a smooth finish. Just remember to prep your heels properly and use light coats for the best results. Experiment with different techniques for unique effects!
What Should I Do if I Make a Mistake While Painting?
If you stumble while painting, don’t fret—every artist’s brush dances with imperfections! For error correction, use paint removal solutions to fix any mishaps, then let your creativity flow and start fresh with confidence.